Home « Portfolio « Later Help Center
This documentation was originally published on Later's public, customer-facing Help Center. Some cross-links have been redacted.
Accessing & Organizing Your Media Library
This article covers how to access and organize the photos and videos in your Later Media Library using Notes, Labels, Starred Media, and more.
What is the Media Library?
Later’s Media Library is where all of the photos & videos you’ve uploaded to Later are stored. It also includes any media saved using Later’s Collect features.
Your Media Library is synced across our desktop and mobile apps, so you can upload and schedule from either place.
Accessing the Media Library
Desktop
From app.later.com on desktop, click Media > Manage Your Media from the menu on the left hand side of the screen to access your Media Library.
You can filter your Media Library using the options on the panel on the right-hand side of the page.
Once in your Media Library, click on any item to open it, then click View on Calendar > Create Post to open the Post Builder. Alternatively, you can schedule from your Side Library (see below).
iOS
From Later’s iOS app, tap Media at the bottom left of your screen to access your Media Library.
You can filter your Media Library by tapping Filter near the top-left.
Once in your Media Library, you can tap any media item > Create Post to create a new post with it.
Android
From Later’s Android app, tap Media at the bottom left of your screen to access your Media Library.
You can filter your Media Library by tapping the filter icon near the top-right.
Once in your Media Library, you can tap any media item > Create Post to create a new post with it.
Using the Side Library
The Side Library is an alternate location for organizing and managing your Media Library when using Later on desktop. From the Side Library, you can filter your media and schedule it directly onto your Calendar.
To access the Side Library, go to your Calendar page from app.later.com on desktop and it will be on the left-hand side of the page:
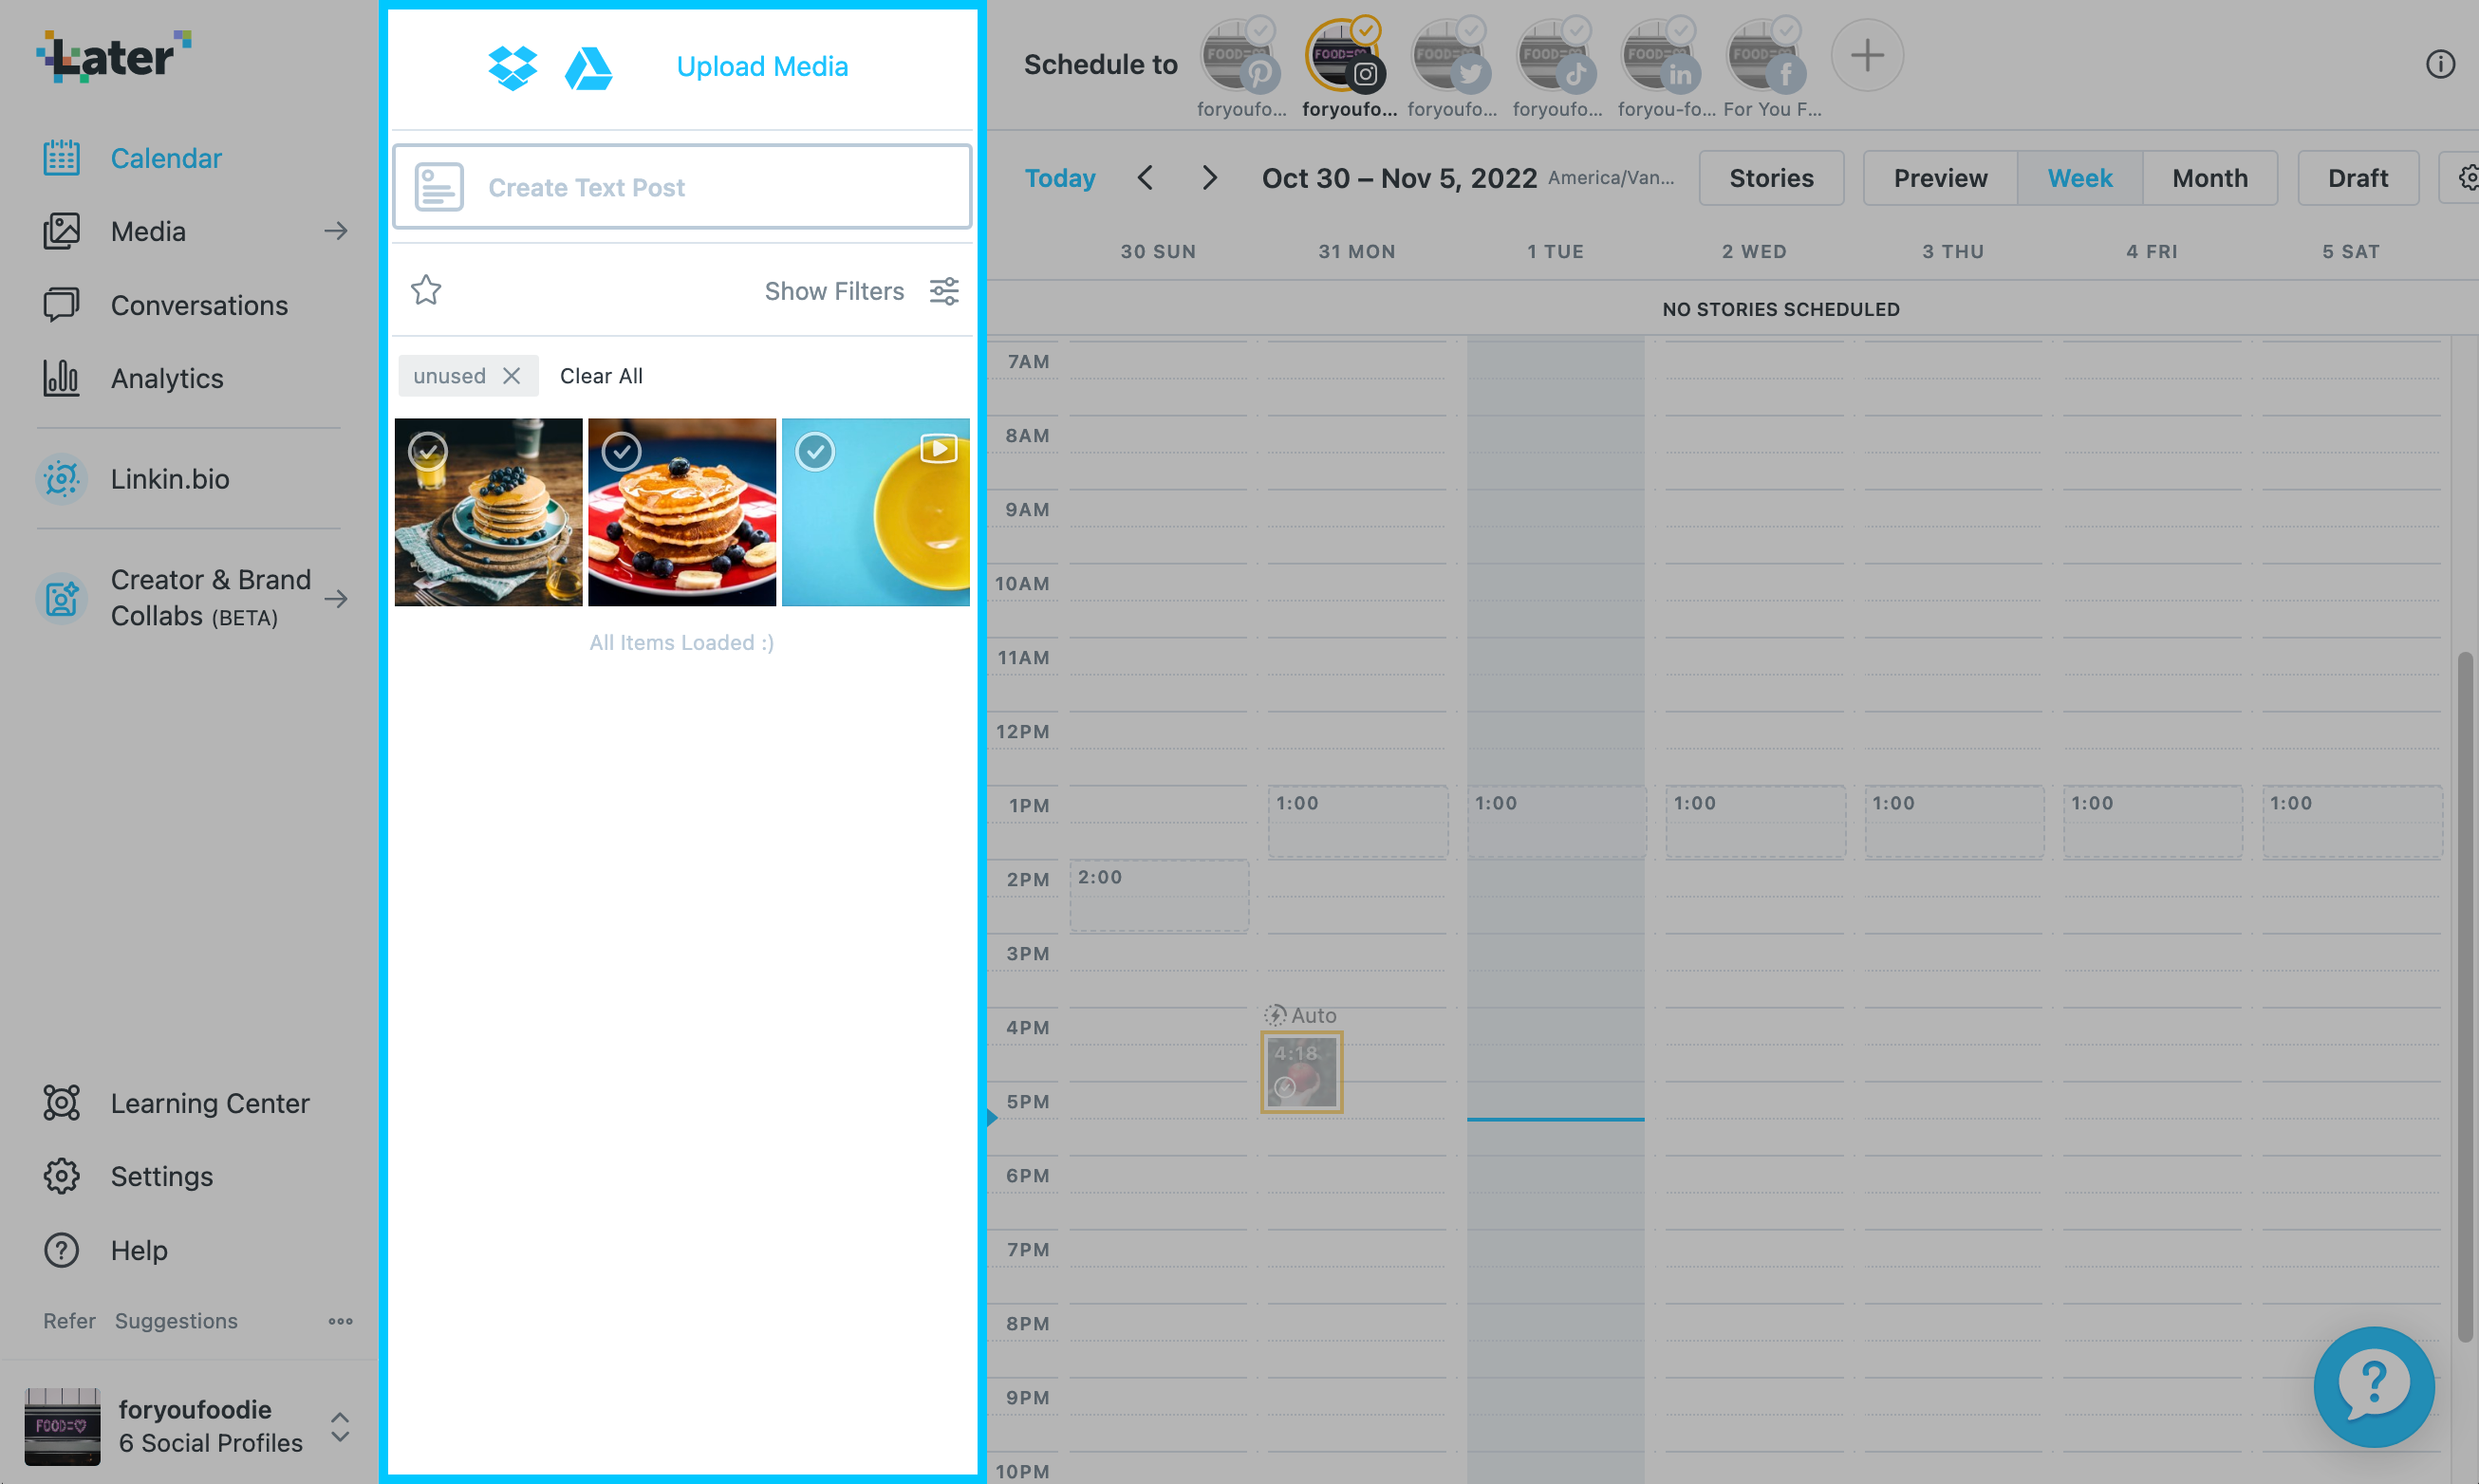
By default, the Side Library will be filtered by unused media, which is media that hasn’t been used in any posts yet. You can remove this filter by clicking the X next to it.
Click Show Filters to adjust which media is shown in your Side Library based on Notes and Labels (more on these below!), usage, type, and social profile.
Scheduling from the Side Library
You can drag a media item directly from your Side Library onto your Calendar to create a post. Doing so will open the Post Builder for that post, for the social profile(s) you have selected above the Calendar.
To schedule Multi-Photo (carousel) posts, select multiple media items (using the checkboxes in the top right corner of each item) before dragging them onto your Calendar.
Alternatively, you can Quick Schedule multiple posts at once by dragging the media items above your Calendar! Learn more about Quick Scheduling
Media Notes
Media Notes are notes attached to the images and videos in your Media Library to help you stay organized and save time.
Why Use Media Notes?
Media Notes can be used to:
- Better prepare your content messaging (e.g. draft your caption)
- Communicate content guidelines to your teammates (e.g. what editing style to use)
- Leave reminders for yourself or your team (e.g. to credit a certain photographer)
Since Media Notes are attached to the media item, they will automatically copy over into the caption field when the media item is scheduled! This makes them an ideal place to draft captions in advance.
How to Add Media Notes
You can attach Media Notes to media items from desktop, iOS, or Android, and—just like the media items themselves—they’ll sync automatically across devices. Here’s how:
Desktop
From app.later.com on desktop, you can add Media Notes from either your Media Library page or the Side Library. The process is the same for each:
- Click on the media item you want to add Media Notes to
- Under the preview image, click Edit next to Notes
- Add your Notes
- Click Update (or Close to discard your changes)
iOS
- From Later’s iOS app, tap Media in the bottom-left to access your Media Library
- Tap on the media item you want to add Media Notes to
- Tap the pencil icon in the bottom-left
- Add your Media Notes in the field provided
- Tap Update (or < Media View to discard your changes)
Android
- From Later’s Android app, tap Media in the bottom-left to access your Media Library
- Tap on the media item you want to add Media Notes to
- Tap the pencil icon in the top-right
- Add your Media Notes in the field provided
- Tap Save (or X to discard your changes)
Labels
Labels are like tags on your media items, allowing you to group and filter media items to quickly find what you’re looking for.
Some Labels are applied by default, such as canva for designs imported from Canva. But, you can also create your own custom Labels!
Creating & Deleting Labels
Desktop
- Go to your Media Library
-
Near the bottom of the right sidebar, next to My Labels, click Manage
- From here, you can also view all your Labels and sort them by name or usage
- To delete a Label, click the trash can icon next to it in the Manage Labels list
- To create a Label, type its name in the Add New Label field
- Click the plus (+) icon
- Click Done
iOS
- On Later’s iOS app, tap Media in the bottom right
- Tap Select in the top right
-
Tap the checkboxes on one or more media items
- Don’t worry about which one(s) you select—you can create the Label without actually adding it to these items
- Tap the Label icon in the bottom left of the screen
-
To delete a Label from the list, long-swipe on it from the right side of the screen
Important: This will delete the Label from your account. If you just want to remove this Label from the media item, follow the process in the Labeling Media section of this article below. - To create a Label, tap Create New Label
- Type your Label name in the field
- Tap Create
Android
- On Later’s Android app, tap Media in the bottom right
-
Tap on any media item
- Don’t worry about which one you select—you can create the Label without actually adding it to this item
- Tap the Label icon near the top right
-
To delete a Label from the list, tap the 3 dots > Delete
Important: This will delete the Label from your account. If you just want to remove this Label from the media item, follow the process in the Labeling Media section of this article below.
- To create a Label, tap the plus sign (+) in the top right
- Type your Label name in the field
- Tap the checkmark near the top right
Labeling Media
Now that you have Labels in your account, here’s how to add and remove Labels from your media items!
Desktop
- Go to your Media Library page on app.later.com on desktop
- Click the media item you’d like to edit the Labels for
-
To add a Label, click Add next to ‘Labels’ and select your Label from the list
- You can also create a new Label to add from here
-
To remove a Label, click the X next to the Label in the list
- If there is no X next to a Label, then it is a system-added Label (such as canva) that cannot be removed
- That’s it! You can now close the media editor modal
iOS
- On Later’s iOS app, tap Media in the bottom right
- Tap Select near the top right
-
Tap the checkbox(es) on the media item(s) you’d like to edit the Labels for
Tip: To edit the Labels for a group of media items in bulk, you can select multiple media items at this step. - Tap the Label icon near the bottom-left
-
To add a Label, tap the one(s) you’d like to add so a green checkmark is displayed next to it
- You can also create a new Label from here by tapping Create New Label near the top of the screen. Once created, you’ll still need to tap on it to add it to this media.
- To remove a Label, tap the one(s) you’d like to remove so the green checkmark next to it disappears
- Tap Done
Android
- On Later’s Android app, tap Media in the bottom right
- Tap on any media item
- Tap the Label icon near the top-right
-
To add a Label, check the box next to it
- You can also create a new Label from here by tapping the plus sign (+) near the top-right. Once created, you’ll still need to tap its checkbox to add it to this media.
- To remove a Label, uncheck the box next to it
- Tap the X near the top-left
Starred Media
Another way to organize your Media Library when using app.later.com on desktop is with Starred Media. Starred items can be filtered for, similar to Labels, so you can quickly find what you’re looking for.
How to Star Media
- Go to your Media Library page on app.later.com on desktop
-
To Star a single media item, hover over that item then click the Star icon
- Alternatively, you can Star multiple media items at once by selecting the items using the checkboxes, then click Star near the top-right
Deleting Media
You can delete any media items you no longer want in your Media Library from desktop or mobile. (Remember, your Media Library syncs across devices!)
Desktop
When using app.later.com on desktop, you can delete media from your Media Library page as well as from the Side Library:
- Click on the media item you’d like to delete
- Tap the trash can icon
- Click Delete
Alternatively, from the Media Library page (not the Side Library), you can delete several media items at once. Select the media items using the checkboxes and then click Delete near the top of the page.
iOS
- On Later’s iOS app, tap Media in the bottom right
- Tap one media item, or tap Select and then select several media items to delete at once
- Tap the trash can icon near the bottom of the screen
- Tap Delete to confirm
Android
- On Later’s Android app, tap Media in the bottom right
-
Tap the media item you’d like to delete
- To bulk-select, tap and hold on the first media item, then select the other items once the blue outline appears
- Tap the 3 dots near the top-right
-
Tap Delete
- If prompted, tap Yes to confirm
Home « Portfolio « Later Help Center