Home « Portfolio « Digital Art Tutorials
This article was originally published as an educational blog post with an email list opt-in incentive. The opt-in form has been redacted.
The Basic Photoshop Brush Settings Every Digital Artist Needs to Know
As a digital artist, the Photoshop brush tool is arguably the single most important tool you need to know inside and out — and, in turn, Photoshop brush settings are incredibly important to have an understanding of as well!
That being said, all of the settings can be a bit overwhelming when you’re first starting out. This post won’t cover every single one of them (that would be a looong post), but it is meant to break down some of the most important ones that you need to know for digital art and illustration. So, if you’ve ever wondered how to use Adobe Photoshop brush settings for digital art, this guide should help you out!
Here are the Photoshop brush settings I’ll cover in this article:
- Size
- Hardness
- Opacity
- Flow
- Spacing
- Brush tip shape
- Bonus: How to install custom Photoshop brushes :)
I’ve also shortened the information in this post into a one-page PDF cheatsheet that would be a handy reference to have at-a-glance while you’re working in Photoshop. It also includes a list of sites where you can download Photoshop brushes for free. Download the free guide below:
[opt-in form redacted]
This tutorial will be covering the settings in Adobe Photoshop CC, but if you have a previous version of Photoshop, the settings covered in this article should be virtually the same — the screenshots just might look a bit different.
A Note on Custom Photoshop Brushes
As you may know, there are many (many, many, many!) custom brushes that you can download for Photoshop. These are incredibly useful and absolutely have their place in the digital art medium! 🖌
That being said, there is also a lot that you can do with the basic brushes that come packaged with Photoshop by default — if you know how to configure the settings properly.
It’s my belief that you will ultimately be a more capable digital artist if you have a strong understanding of these basic Photoshop brush settings, so that you can differentiate between the situations when it is appropriate to seek a custom brush, and when an effect can be achieved by tweaking the settings of an existing brush. I hope that makes sense!
That said, I understand the allure of custom brushes. I definitely use them myself! As such, I’ve included a list of websites where you can download awesome Photoshop brushes for free in the free Photoshop brush settings reference guide below:
[opt-in form redacted]
Are these brush settings only relevant if you have a tablet pen?
No! You can absolutely take advantage of these settings if you’re creating digital art without a tablet pen. So whether you don’t have a tablet pen yet, or aren’t interested in getting one ever, this article should still be useful for you!
When you first select the Photoshop Brush tool (the keyboard shortcut is ‘B’), this is the menu you’ll see at the top of your screen:

These 3 brush settings are specific to tablet pen users, to allow them to use pressure sensitivity to affect their brush settings:

For the purposes of this article, I’m going to disable those pressure settings completely to demonstrate how these settings function without a tablet pen.
That said, if you do have a tablet pen and are interested in having an understanding of those settings, let me know in the comments below and I can write a separate blog post covering those!
Without further ado, let’s cover the basic Photoshop brush settings for digital art and illustration!
Brush Settings: Size & Hardness
To review, once you select the Brush tool in Photoshop, this is what the brush settings toolbar should look like across the top of your screen:
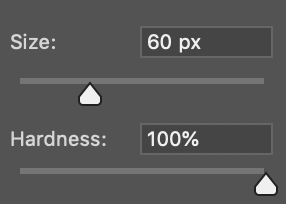
Two of the most important and basic settings live under this icon:
Those settings are size & hardness.
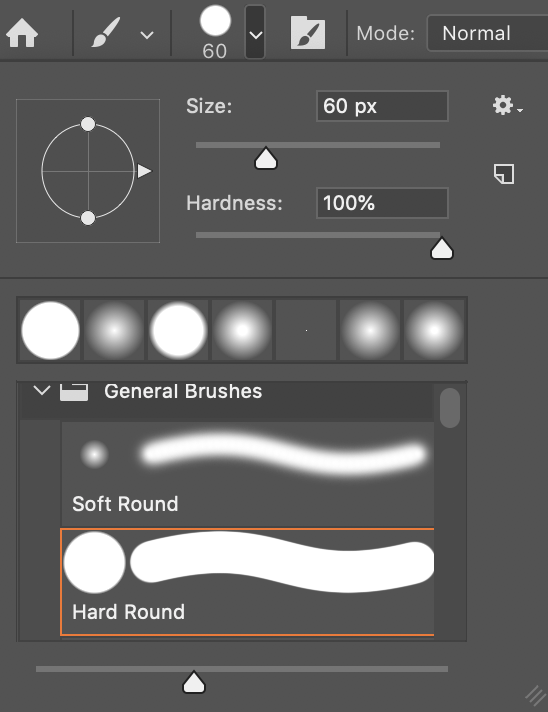
If you click on that icon, you’ll see a dropdown menu that looks something like this:
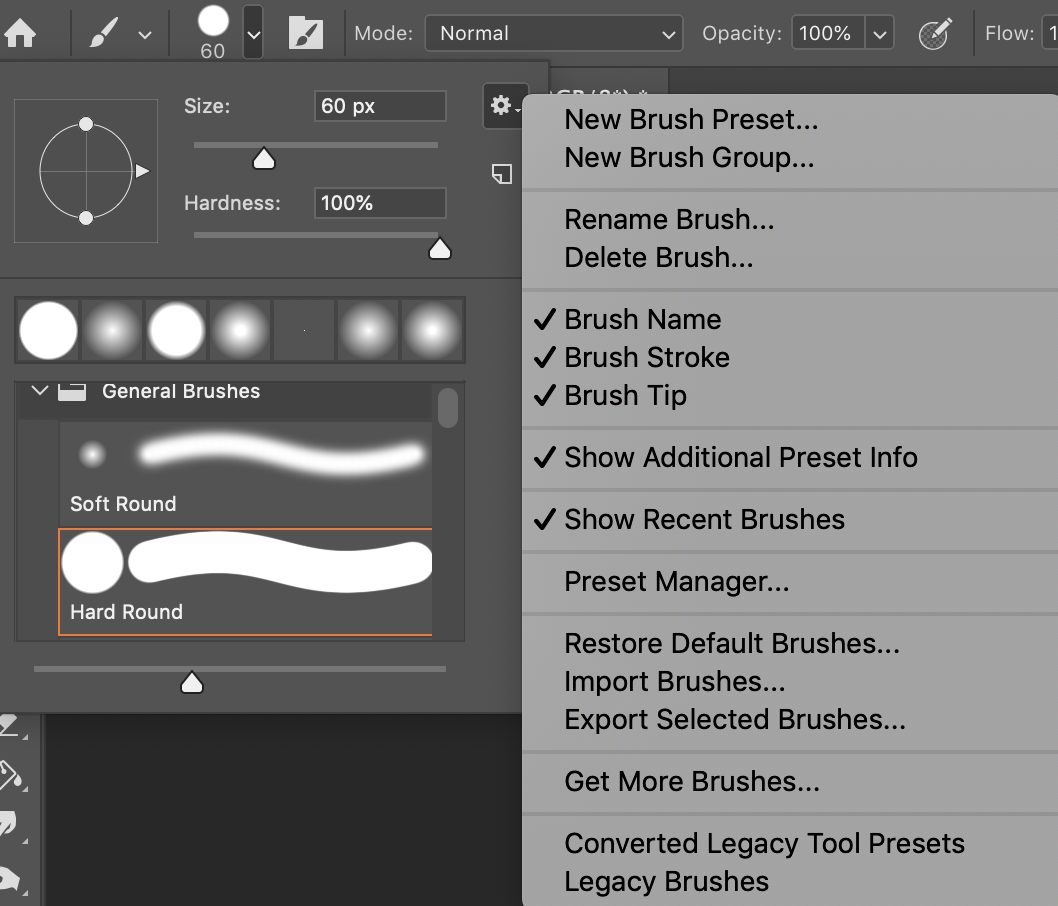
To reconfigure what is & isn’t shown in this panel, you can click the gear icon in the top right to make adjustments. Here’s what my configuration looks like, if you’d like to match:
In any case, for right now, feel free to ignore the thumbnails of different brushes at the bottom. I’m just going to go over these settings using the basic hard round brush as an example:
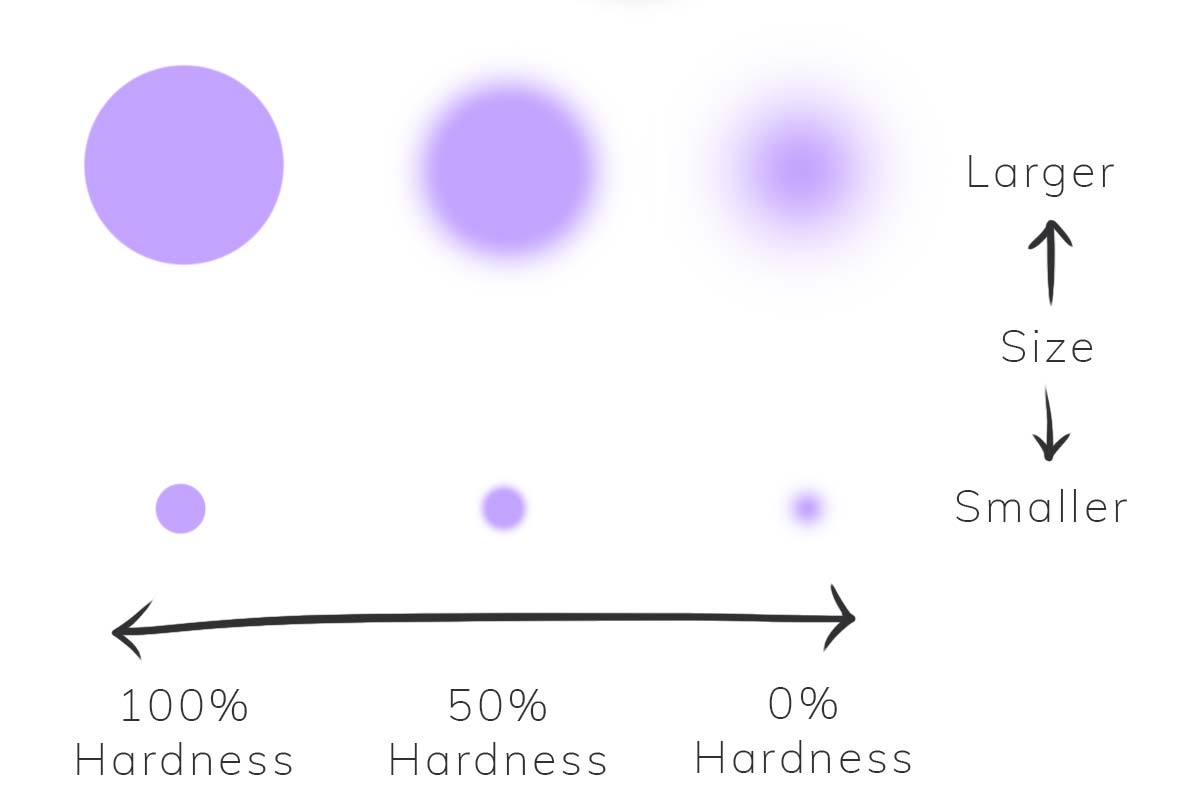
Size refers to the diameter of the brush. Larger size = larger brush diameter, and vice versa: smaller size = smaller brush diameter.
Hardness refers to the (for lack of a better word) ‘fuzziness’ of the edges. Higher hardness percentage = less fuzziness (harder edges), and vice versa: lower hardness percentage = more fuzziness (softer edges).
A picture speaks a thousand words, so check out the graph below that illustrates the effect of these settings on the Round Brush:
…just a note, the graph above is also included in the free Photoshop brush setting cheatsheet that accompanies this article! Make sure you download it below to have it available for quick future reference:
[opt-in form redacted]
Brush Settings: Opacity & Flow
The next settings digital artists should be familiar with are Opacity & Flow, and — possibly more importantly — the difference between them. (I’ll admit that this one confused me for awhile! For the longest time, I completely ignored Flow… sad face.)
These two settings have to do with translucency & buildability of colour.
The main difference between them lies in buildability.
With Opacity, the section that you’re colouring will stay at the same translucency level no matter how many times you go over it, as long as you don’t lift up the mouse/pen. If you lift the mouse/pen and start colouring over the same section again, it will layer more colour on top, therefore building up the translucency and making the colour in that section more opaque. However, you have to lift your pen each time you want to build the opacity further.
With Flow, the building of the translucency happens while you’re colouring over the same area, without lifting the mouse/pen. I think it is easiest to visualize this difference with animations. Again, a picture speaks a thousand words — and as artists, many of us are visual learners! :)
In the following Gif, I am using the brush tool with 50% Opacity and 100% Flow. I draw one circle, lift my pen, then draw another circle that slightly overlaps the first:

Notice how with the first circle, even though I coloured over the area several times, the translucency stayed constant. Only when I lifted my pen and started a new circle did the overlapping area become more opaque.
In this next Gif, I’ll be using 1% Flow and 100% Opacity. In this one, I don’t lift my pen until the end:

See the difference? As I continued to draw over the same area without lifting my pen, the colour continued to build. Notice how the center, where I coloured the most, is completely opaque, whereas the lines at the edges (that I only went over once or twice) are more see-through.
Honestly, without a tablet pen (and therefore pressure sensitivity), it’s admittedly pretty subtle. Flow is definitely an effect that shines when you can use a tablet pen and adjust the pressure to really get that painterly effect. 🌟However, I still wanted to include a demo of it here regardless as I think it’s important to understand!
Interestingly, Flow is more akin to traditional painting — but it tends to be the one that gets forgotten!
Brush Settings: Spacing
If you can see the circles your brush makes while you colour, like this:

…this is an issue with your brush spacing. If the brush spacing is set too high, it can cause you to actually see the shapes the brush makes (the brush tip) spread out from one another, forming a jittery-looking line. This is because Photoshop is leaving too much space between the brush tips!
For some decorative brushes, it makes sense to have the brush tips spread out. However, if you’re using the basic round brush like I am in this article (and as I commonly do for digital outlining), you likely want them to be very close together to form a smooth-edged line.
To fix this, bring up the Brush Settings dialog by clicking this icon in the Brush toolbar:
On the Brush Tip Shape panel at the bottom, you can adjust the Spacing:
Brush Settings: Brush Tip Shape
Going back to our main brush settings dropdown from the beginning, we’re going to look at the funky graph thing next to the Size & Hardness settings. This is the one I mean:

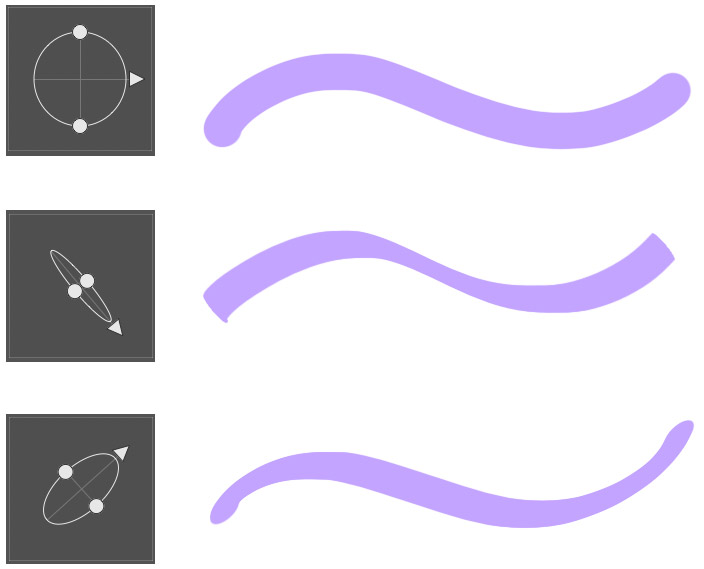
This represents the shape of the tip of your brush. So, this brush is a circle. This tool is fairly straightforward to use! Just drag the handles around until you get the shape that you want:
The brush tip you choose is really personal preference. Some people like to sketch and draw with slanted brushes, some like the regular hard brush, it really is up to you. You can create cool calligraphy effects with slanted brush tips as well — get creative! Sometimes the differences are subtle, I’d recommend experimenting to find what you like.
Here are some basic examples — all from adjusting the brush tip shape of the hard round brush:
How to Install Photoshop Brushes
While I still believe that it’s good to leverage Photoshop brush settings where you can, there will almost certainly come times when the built-in brushes can’t quite achieve the effect you want and your best bet is to download a new brush or brush set.
Thus, this guide wouldn’t be complete without instructions on how to do that :) Don’t worry — I’ve got your back!
Also, the free reference guide that accompanies this post includes a list of sites where you can download awesome Photoshop brushes for free! Don’t forget to grab it below:
[opt-in form redacted]
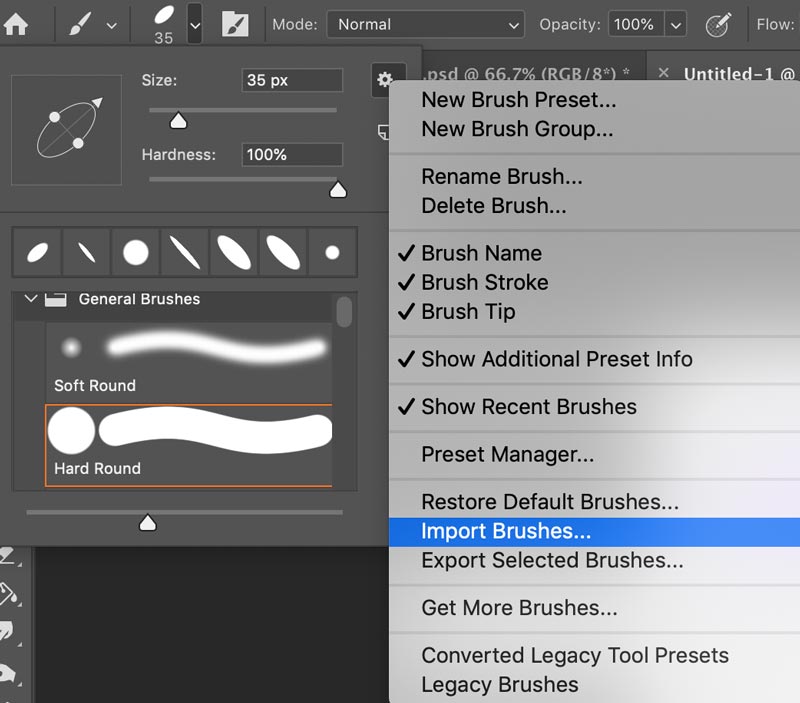
Downloading and installing Photoshop brushes is pretty straightforward! Visit one of the sites from the downloadable reference guide above, and download one of the brush packs. It’ll probably be a .zip file; inside that file, there should be a file with the .abr extension (this is the extension for Photoshop brushes).
Open the brush toolbar, click the gear in the top right corner, then ‘Load Brushes…’. After that you just have to select the .abr file, and they should load into the brush list! That’s it — easy peasy 🍋
That's it!
There you have it! A rundown of the basic brush settings in Photoshop. To review, these are the settings I covered above:
- Size
- Hardness
- Opacity
- Flow
- Spacing
- Brush tip shape
- Bonus: How to install custom Photoshop brushes :)
Like I mentioned near the top of this post, this is by no means an exhaustive guide! There are many more settings that are useful to know, but familiarizing yourself with these ones should give you a good start.
As a reminder, I created a single-page PDF cheatsheet to accompany this article. This is great to have open while you’re working in Photoshop to have a visual reminder of the basic brush settings for digital art at-a-glance! Download it for free below:
[opt-in form redacted]
I’d love to hear your thoughts in the comments below. Are there any must-know brush settings you think I’m missing? Did you find this post helpful? Would you like to see a post on brush settings for tablet pen users? Let me know!
Bye for now! 💖
~ Olivya 🦊
Home « Portfolio « Digital Art Tutorials